
Online Payment Gateways on the eaSYNC Pro Plan
Online payment functionality is critical for customers who purchase products or services online. After all, consumers prefer convenience, so your business should have enough Online Payment Gateways to choose from.
Additional Online Payment Gateways Offered on the eaSYNC Booking Premium Plan

Stripe
If you don’t have one already, you can set up your free Stripe account via the platform’s registration page. But once you have an account, you can connect it to eaSYNC with an Application Programming Interface key. They’ll connect your business site to this Online Payment Gateway.
You can retrieve your unique API key via your Stripe account settings.
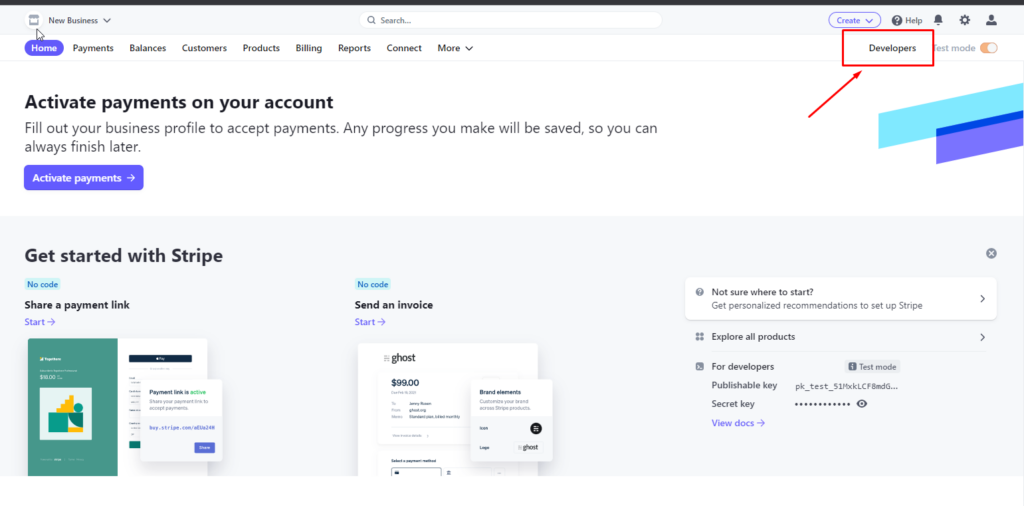
So after logging into your Stripe account, click the Developers option in the top right corner of the dashboard.
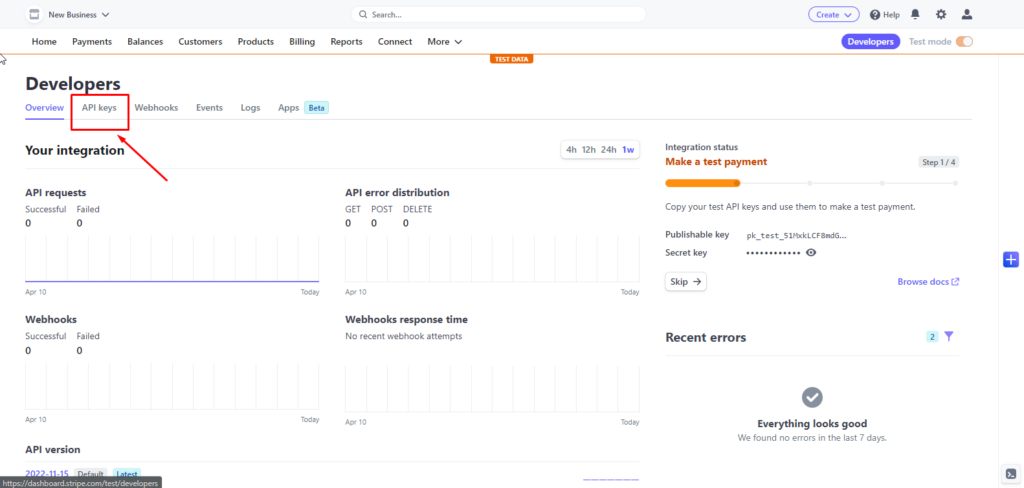
Next, click on the API Keys tab.
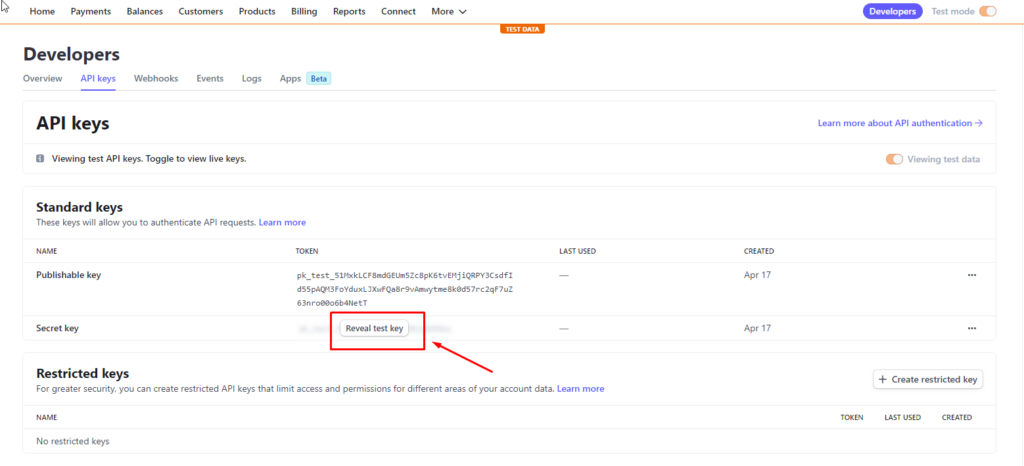
Select the ‘Reveal test key.’ Then, you’ll find your secret and publishable keys.
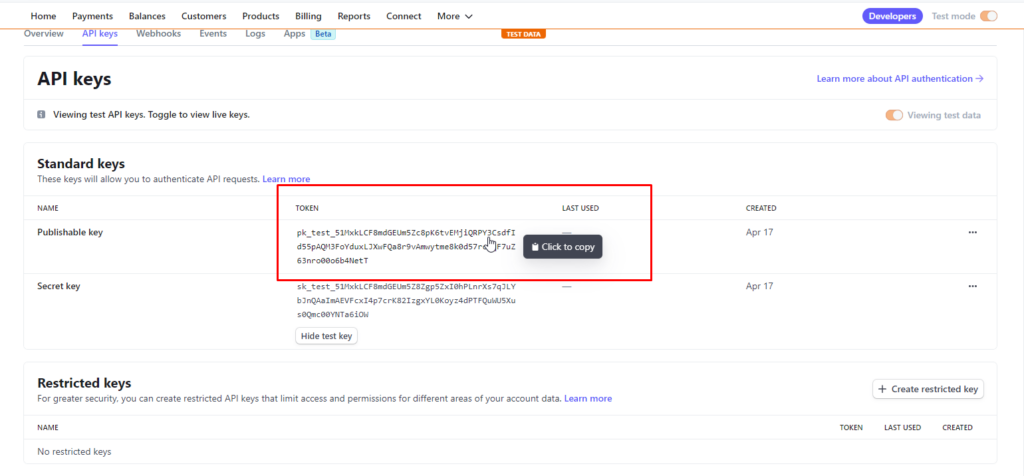
First, copy your publishable key.
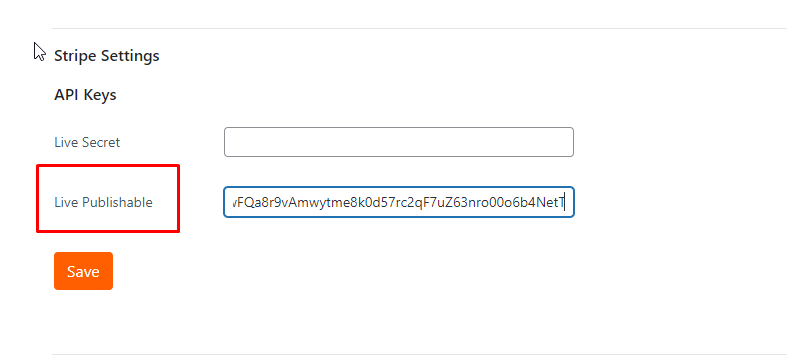
Paste it to the Stripe Settings field in eaSYNC.
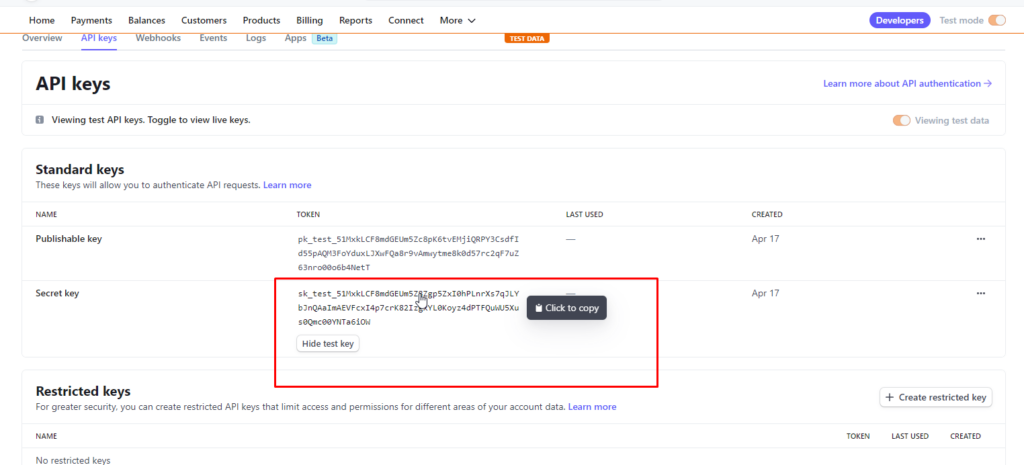
Do the same with the Secret key.
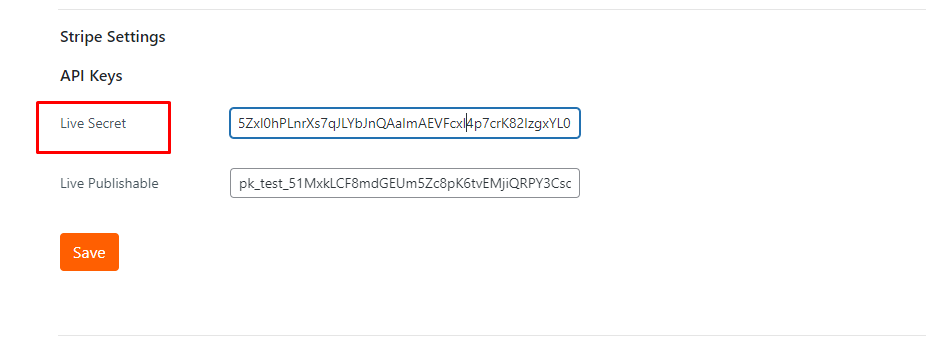
Both must be copied and pasted to the right fields to connect to your site.

Once done, don’t forget to save your keys!

Authorize.net
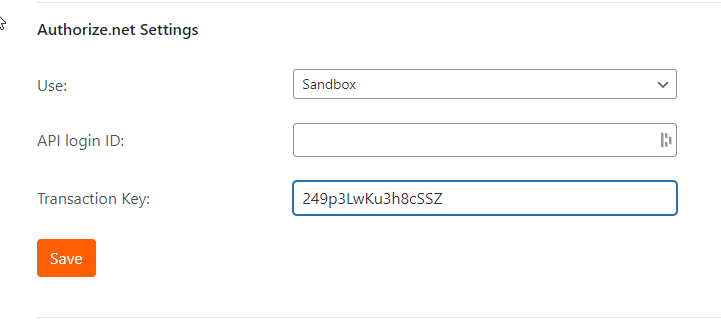
To connect a payment solution to Authorize.net, you need your API Login ID and a Transaction Key.
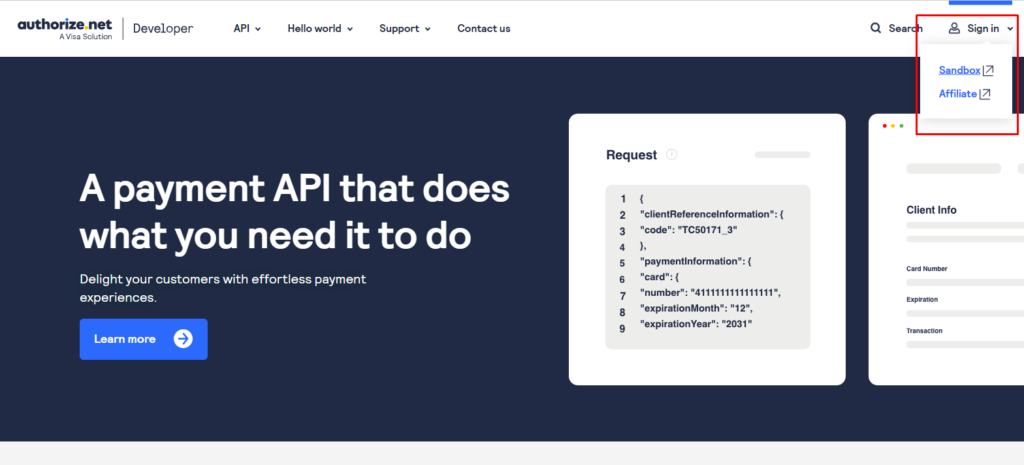
The first step to connecting this Online Payment Gateway to eaSYNC is to sign up or log in on the developer side of Authorize.net. You can click Sandbox if you’re still testing or Production if you already accept payments.
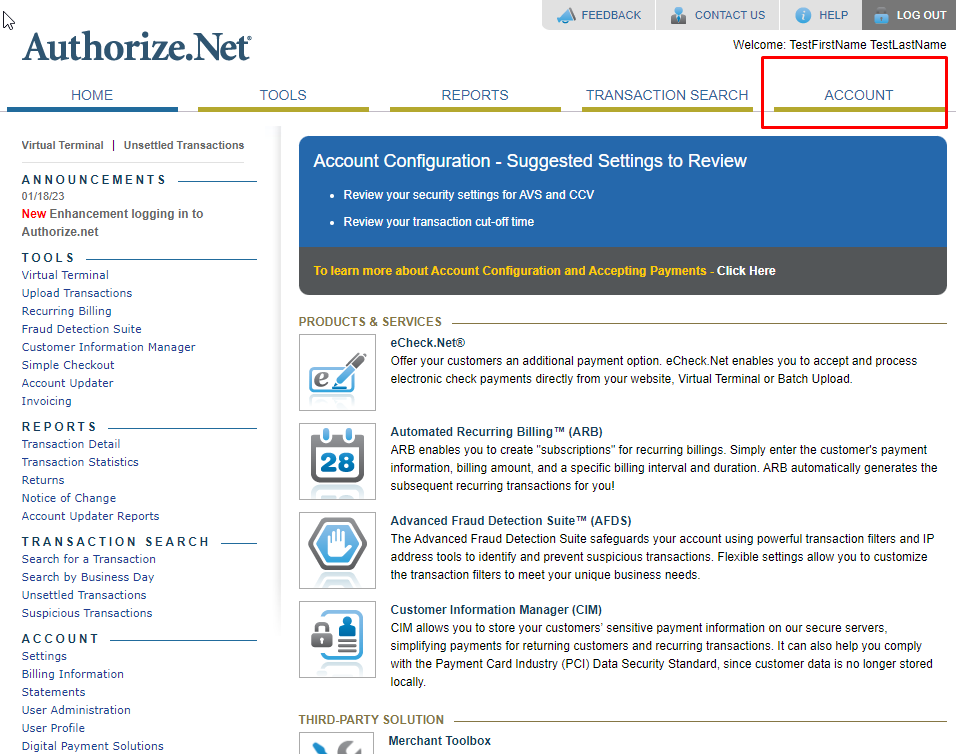
After successfully logging in or signing up, head to your Account tab.

Then, go to the Security Settings section and select API Credentials & Keys.
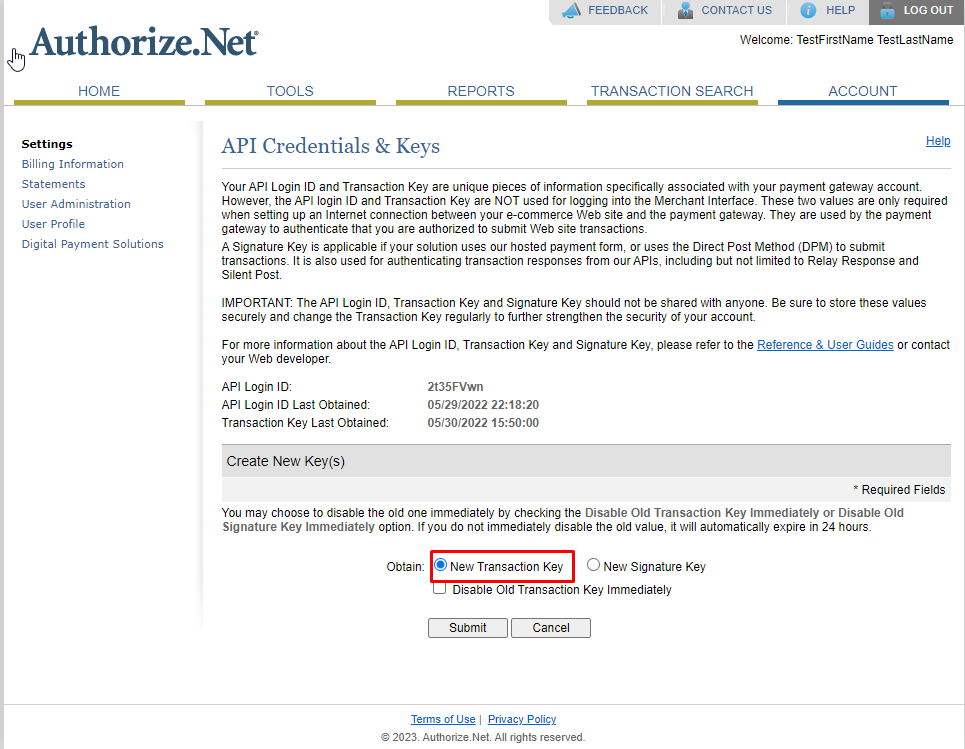
To create a new API key, simply click New Transaction Key.
Once done, click Submit, and you’ll be prompted to request and enter a validation PIN.
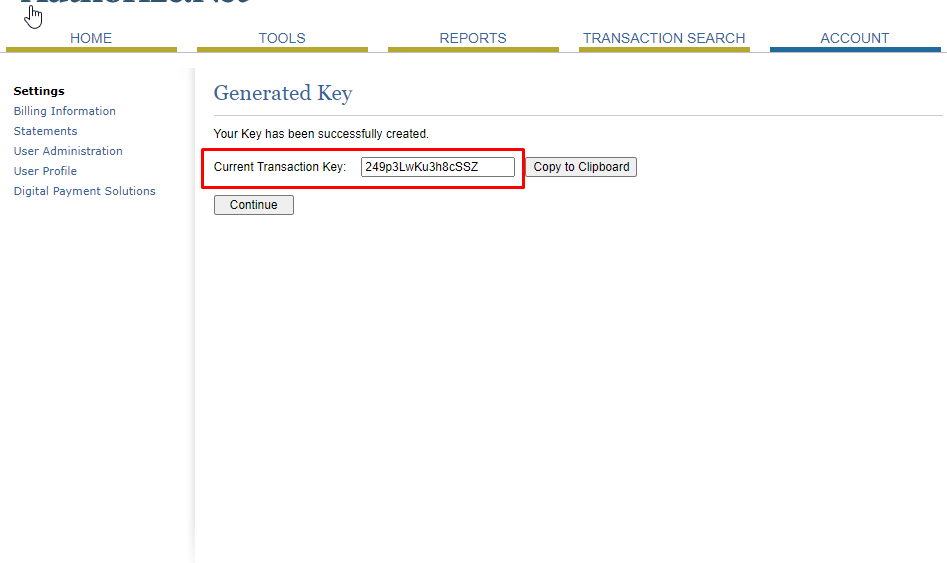
Afterward, you can see your new transaction key.
Next, copy and paste it into the appropriate fields on your eaSYNC Settings page.
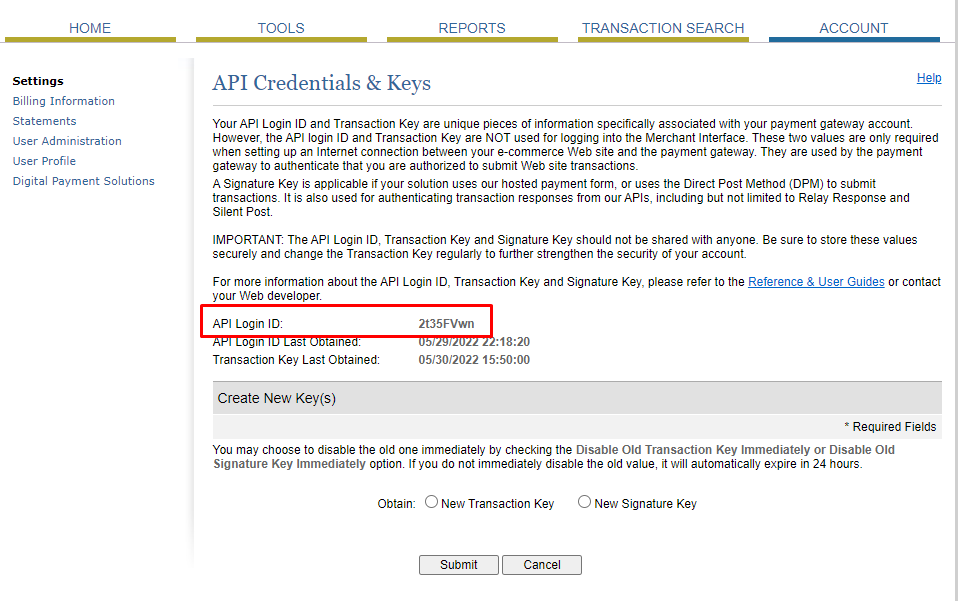
Make sure to add your API login. Of course, you can find it in the API Credentials and Keys section!
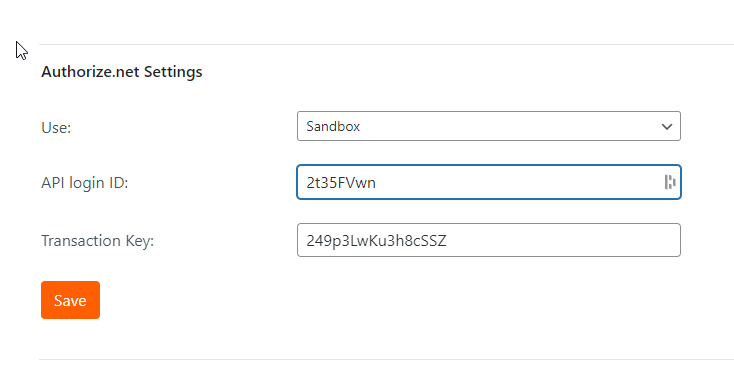
Add it to the appropriate Authorize.net Settings field.
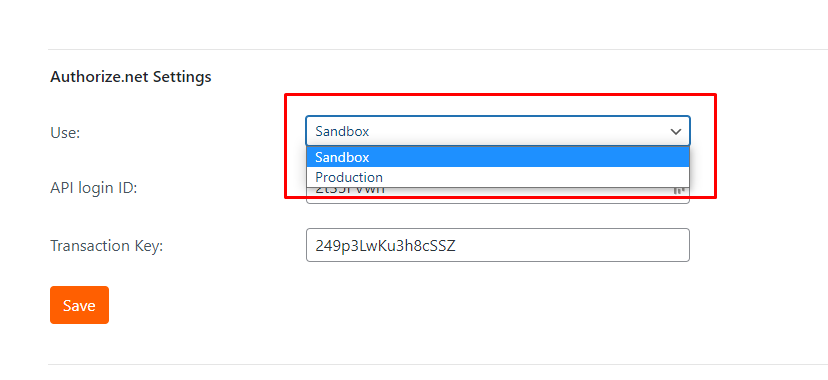
Also, make sure to select the correct Use! Once everything is satisfactory, click Save.
Use Our Premium Plans to Access These Gateways!
The eaSYNC Plugin’s Pro Plans now add Stripe and Authorize.net. In addition to those, the WordPress Booking Plugin offers a variety of payment methods at our customers’ convenience.
Related Articles
-

How to Expertly Market Your Car Rental Business
How to Expertly Market Your Car Rental Business Marketing is one of the fundamental factors that contribute...
-

Top 5 Hospitality Industry Trends to Watch in 2024
Hospitality trends are always evolving, and players in the industry must stay updated to remain relevant and...
-

Coupon Management and its Benefits for Restaurants
Who doesn’t want to take the special offers on coupons and vouchers? They benefit any customers and their...
-

How Generating Financial Reports is Beneficial in a Car Rental System
The car rental industry has been seeing massive growth lately, following the positive growth trends of...
-

Vital Security Measures for WordPress Booking Plugins
Online booking plugins installed on WordPress websites help users rent, book, or reserve products or services with ease. For this reason, many i...
-

Hotel Digital Marketing and Booking: A 5-Minute Guide
The tourism and travel sectors around the world continue to play up their game in managing online...