Car Reservation System WP Plugin Installation Guide
As the leading online publishing platform and content management system (CMS) for websites, WordPress provides businesses and marketing experts with various tools. These tools are essential in promoting their brands, expanding their audience reach, and getting more sales. Because of this, businesses in the car rental industry employ WordPress car rental plugins to create engaging car rental websites. Doing so helps manage online car booking for an improved car reservation system.
The eaSYNC Car Reservation System Plugin
In this article, we will be providing you with a step-by-step guide in installing the eaSYNC car booking plugin for your WordPress car rental website. By following these quick and easy steps, you can integrate a car reservation system into your WordPress website to help you cope with car rental challenges and manage your car rental bookings and reservations with just a few clicks.
Installing the eaSYNC Car Reservation System Plugin
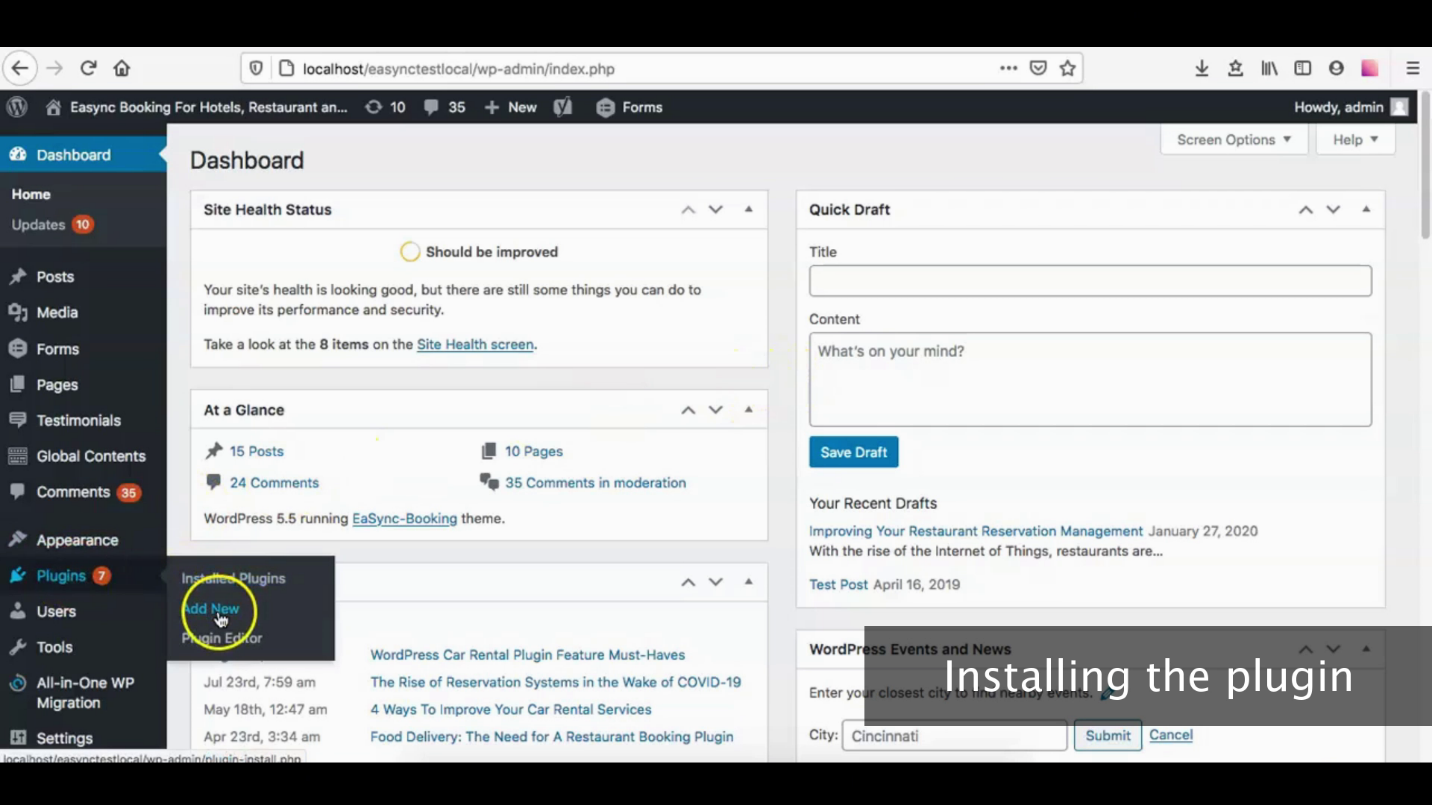
After setting up your WordPress website, you need to head to the admin dashboard. You can find this on the left side of the screen. After this, you can click the Plugins tab and hit on the Add New button.
On the Search Box, input the key phrase “eaSYNC Booking” to bring up the said plugin. After this, click on the Install Now button. After successfully installing the plugin, click Activate.
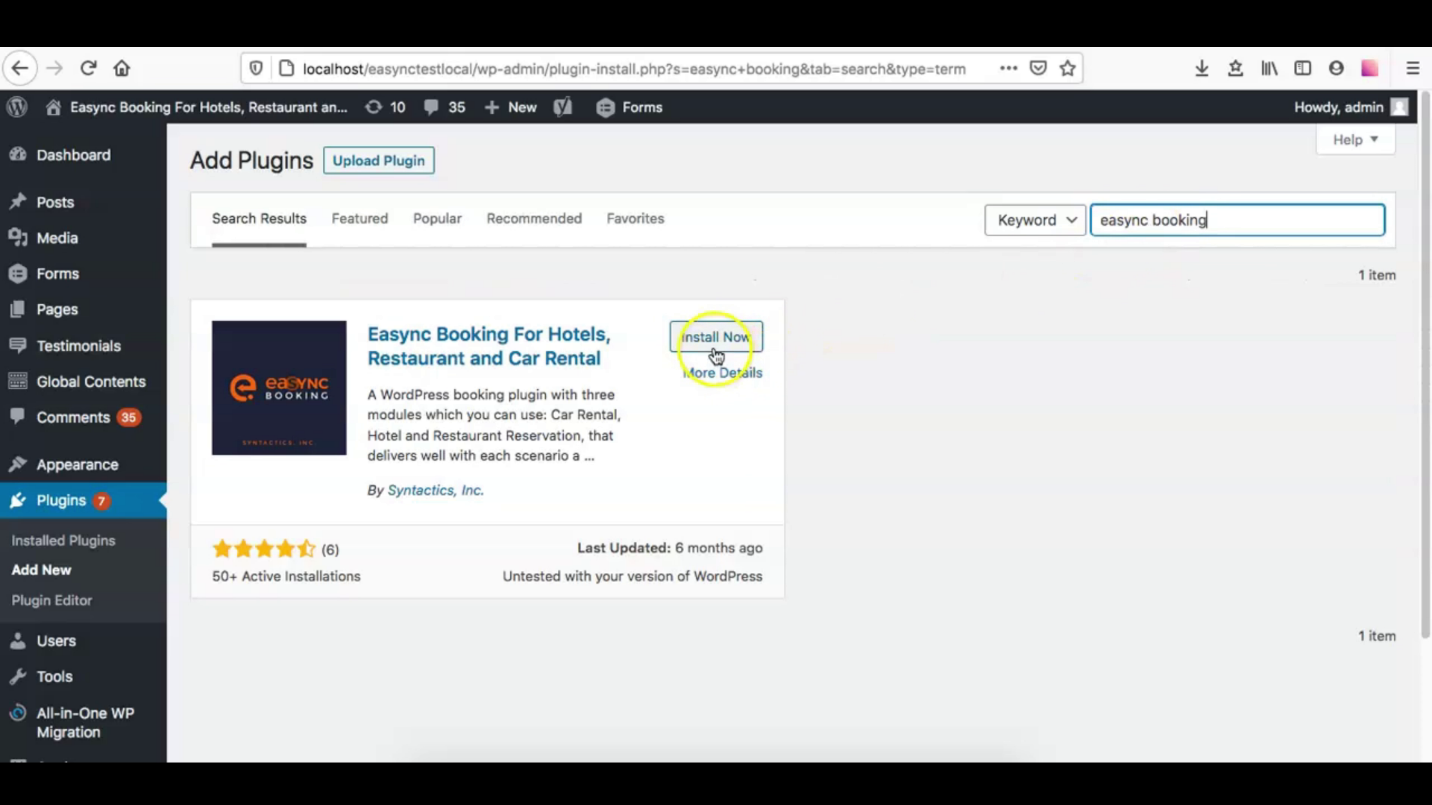
Install and Activate the eaSYNC Booking Plugin
After activating the plugin, WordPress will display a set of instructions on your screen. It will tell you how to use the eaSYNC Booking plugin.
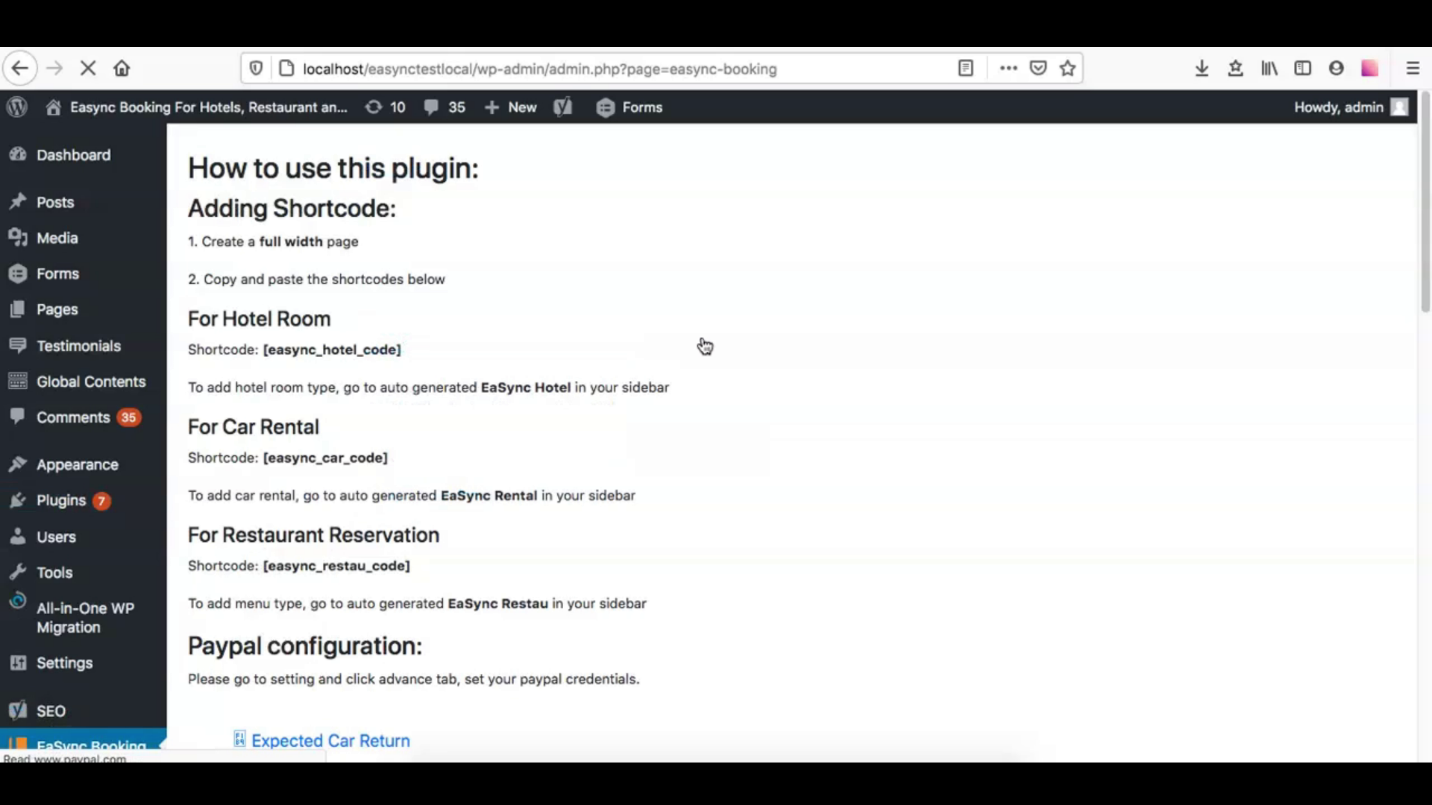
Note: Aside from car rentals, the eaSYNC Booking plugin also caters to hotel bookings and restaurant reservations. Click on the demo for the hotel booking plugin and the restaurant reservation plugin to see how they work!
Enabling the eaSYNC Car Reservation System Plugin
First, on the admin dashboard, under the eaSYNC Booking tab, click on the Settings button.
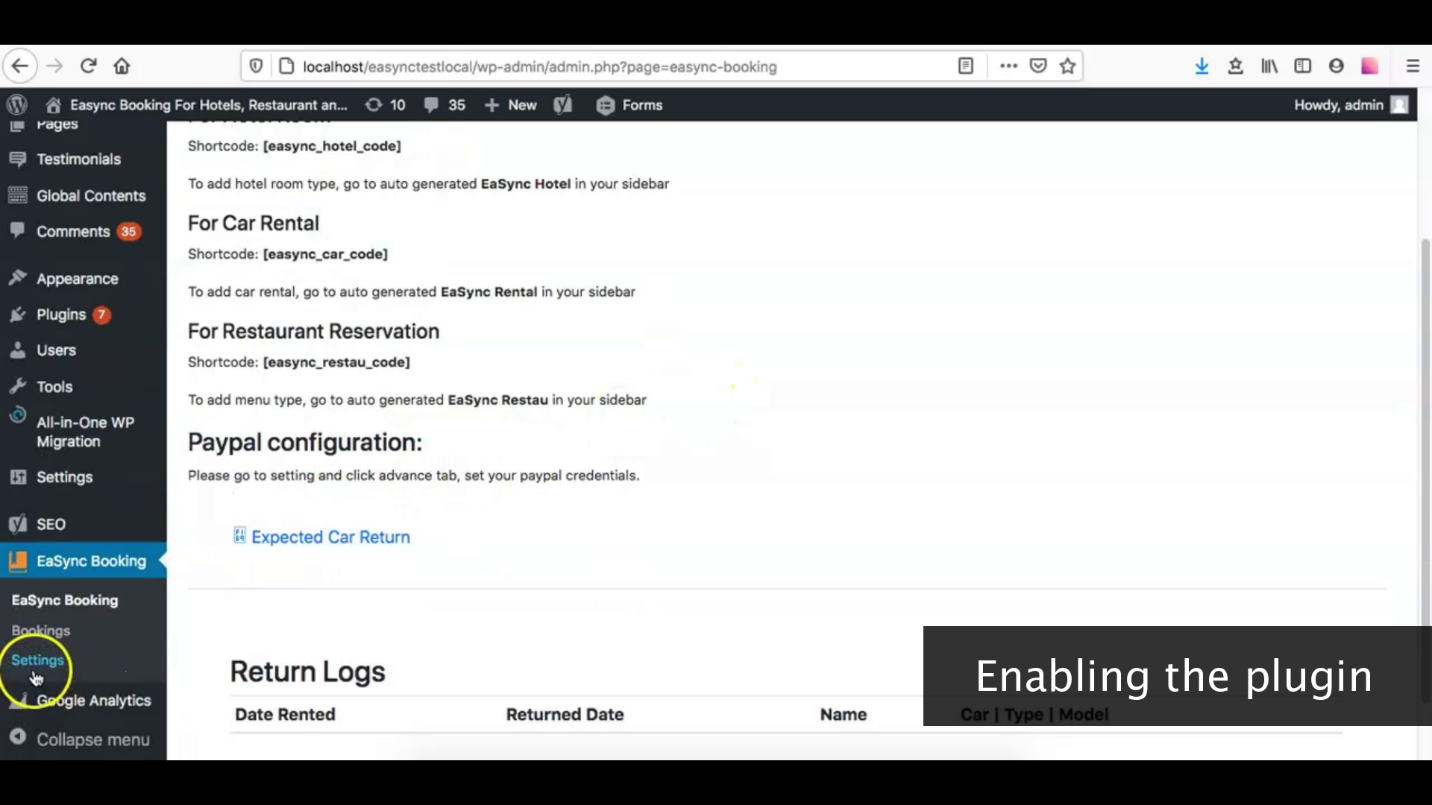
Click on Settings
After that, enable the plugin by switching the Car Rental button ON.
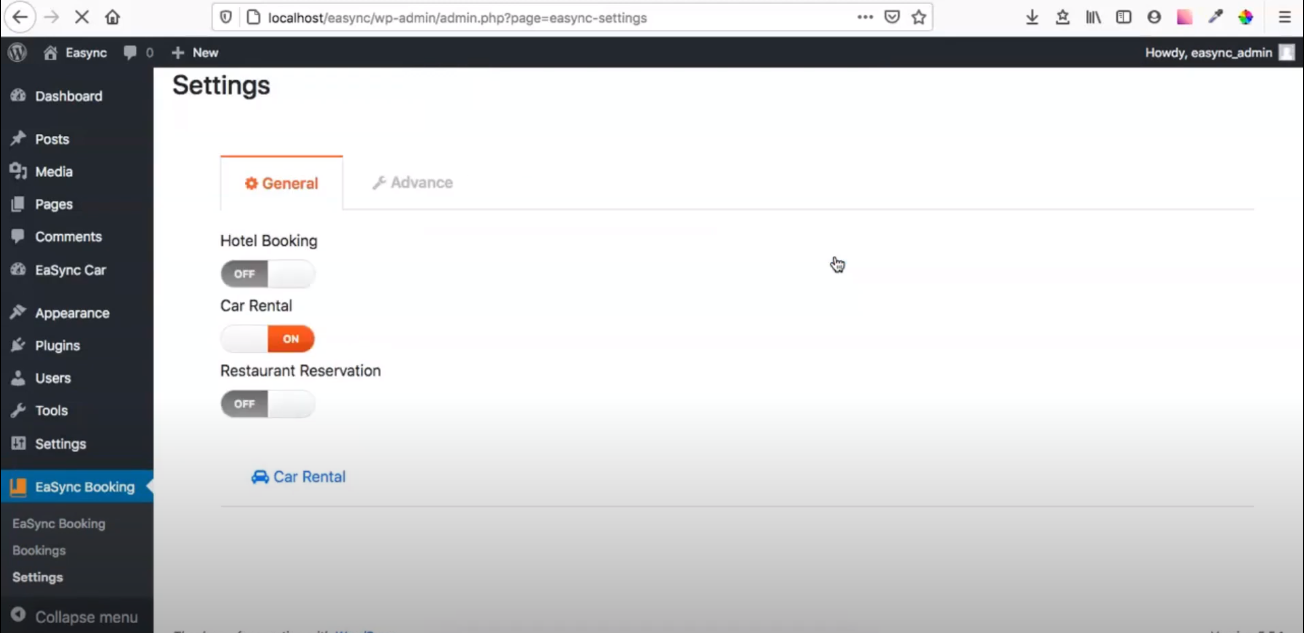
Switch On the Car Rental Plugin
Adding Car Models and Car Types
Then, on the admin dashboard under eaSYNC Booking, click the Settings button. Scroll down to find the Car Rental button and then click on the Car Model button. Type in the name of the new car model. Then, click SAVE.
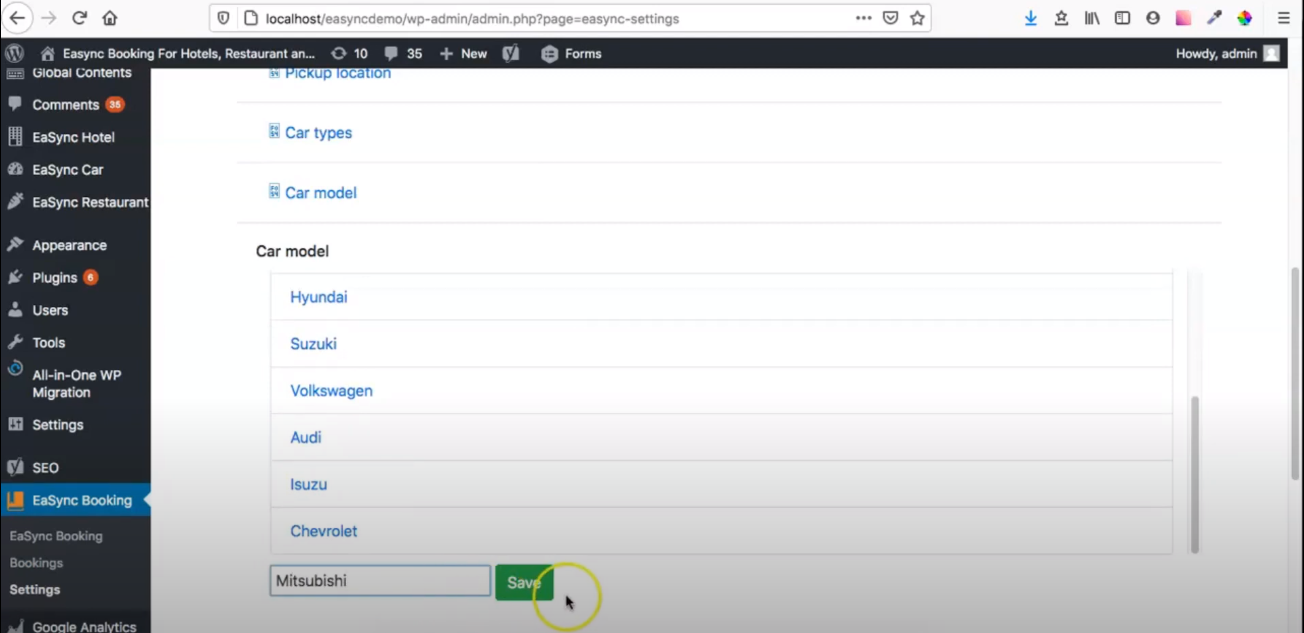
Add New Car Model
Similarly, to add a new car type, head to the admin dashboard and, under eaSYNC Booking, click on Settings. Scroll down to find the Car Rental button and then click on the Car Types button. Then, type in the name of the new car type and click SAVE.
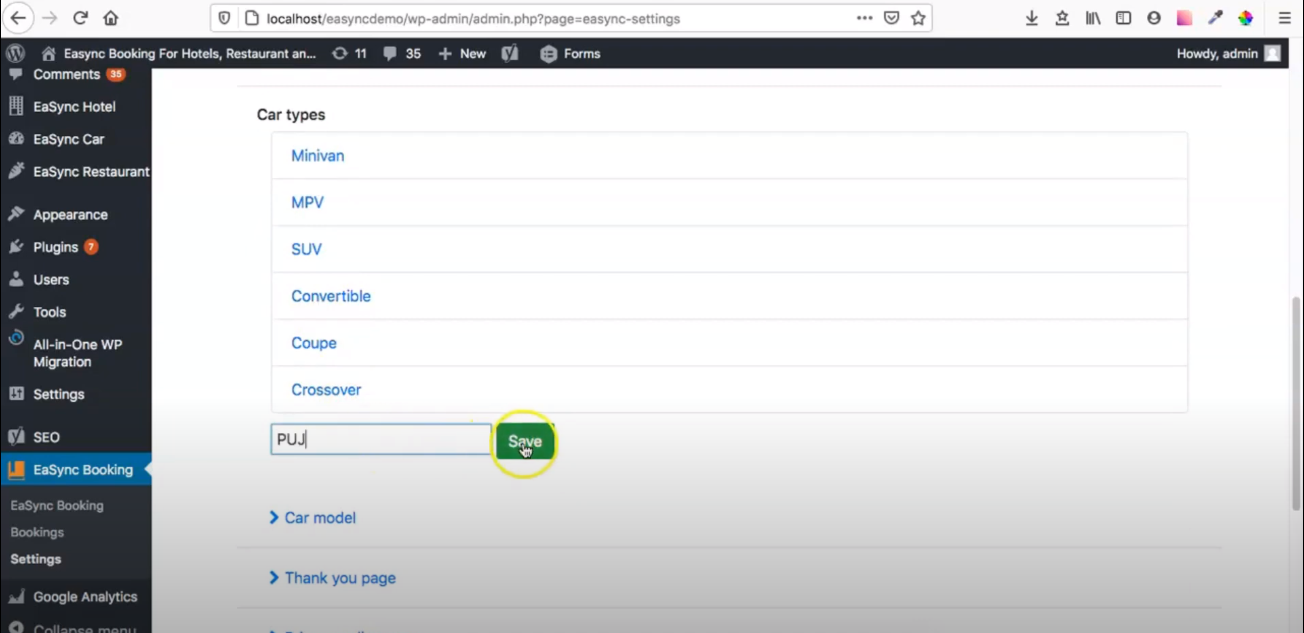
Add New Car Type
Adding New Car and Car Options
To add a new car, first, click on the eaSYNC Car tab on the admin dashboard. Then click the Add New Car button.
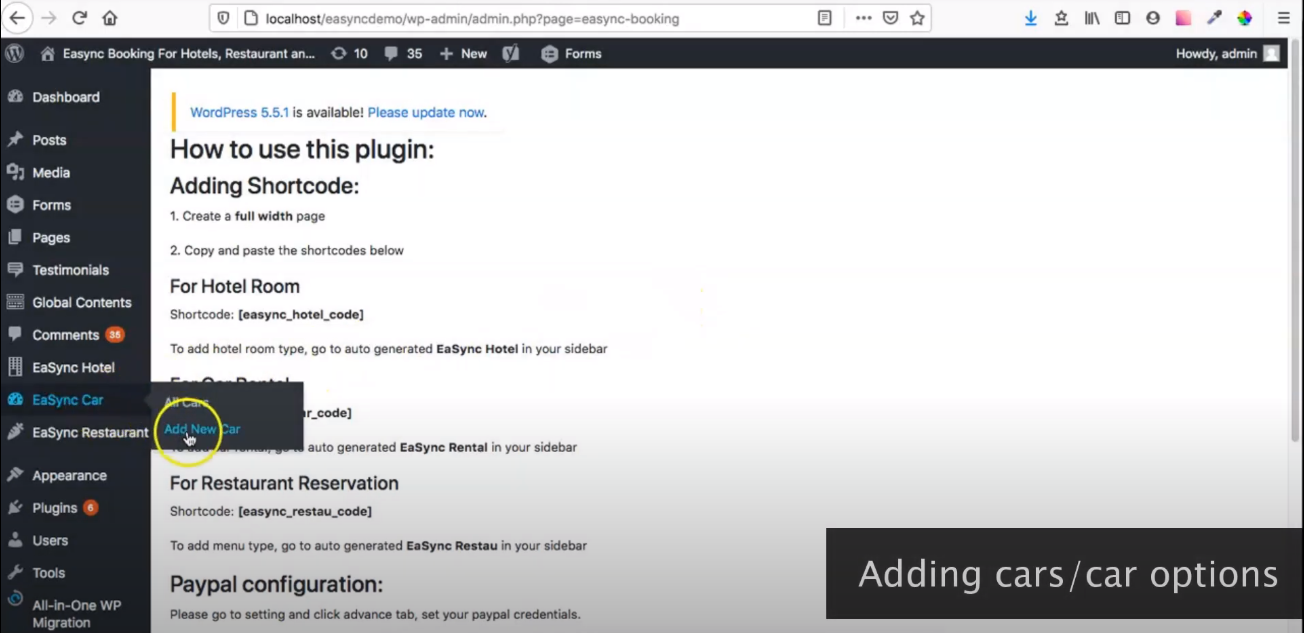
Add New Car and Car Options
After that, you need to put in details about the new car, including its name, price, car type, car model, and other features.
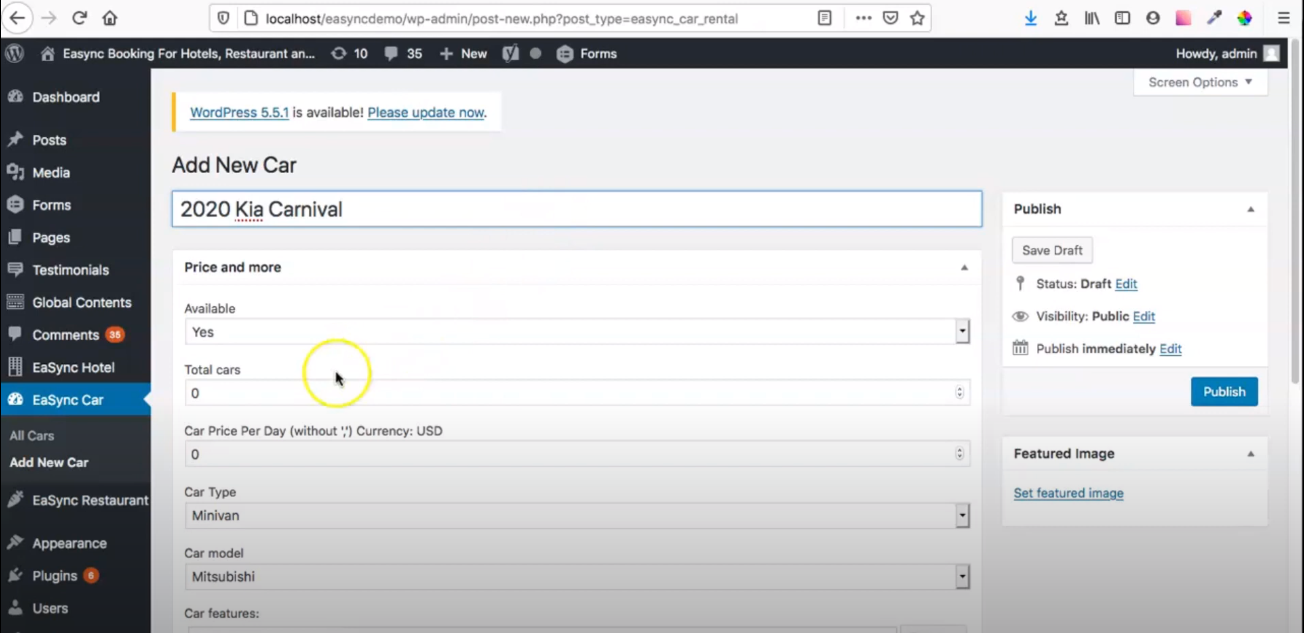
Fill Out New Car Details
Then, to help entice your customers, you can place an eye-catching image of your vehicle.
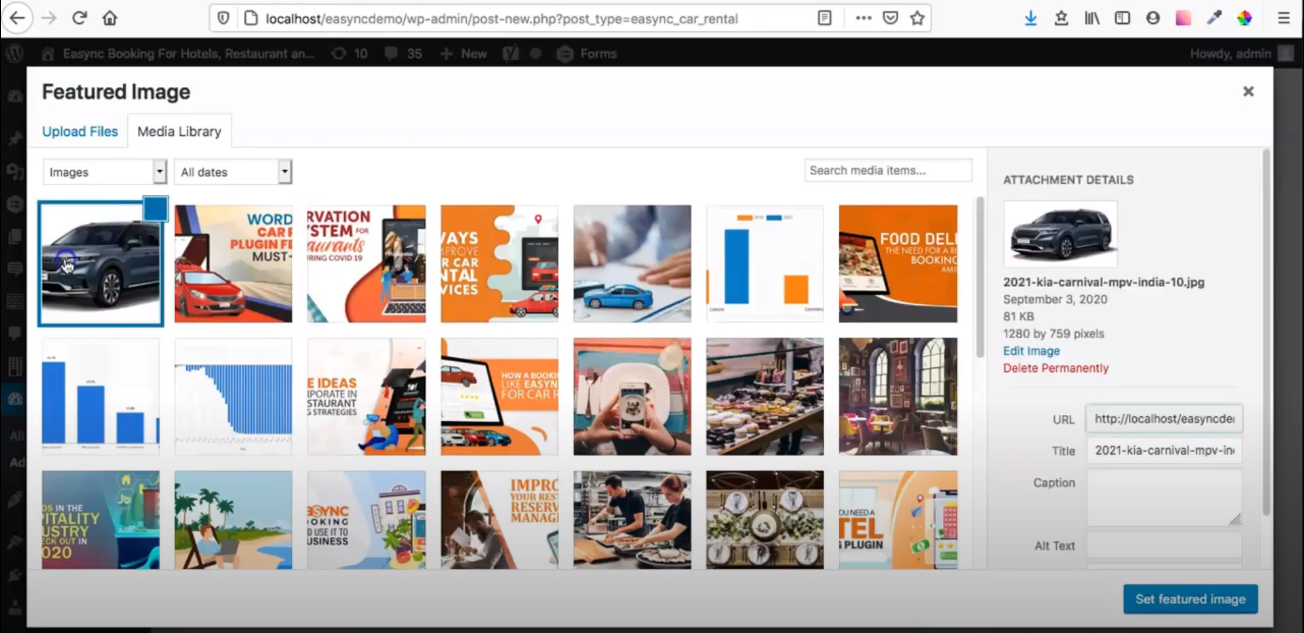
Set Featured Image
Finally, you can click on the Publish button after setting up everything.
Setting Up Car Pick-Up and Return Time
To set up car pick-up and return time, you can click on the Settings tab under the eaSYNC Booking tab on the admin dashboard.
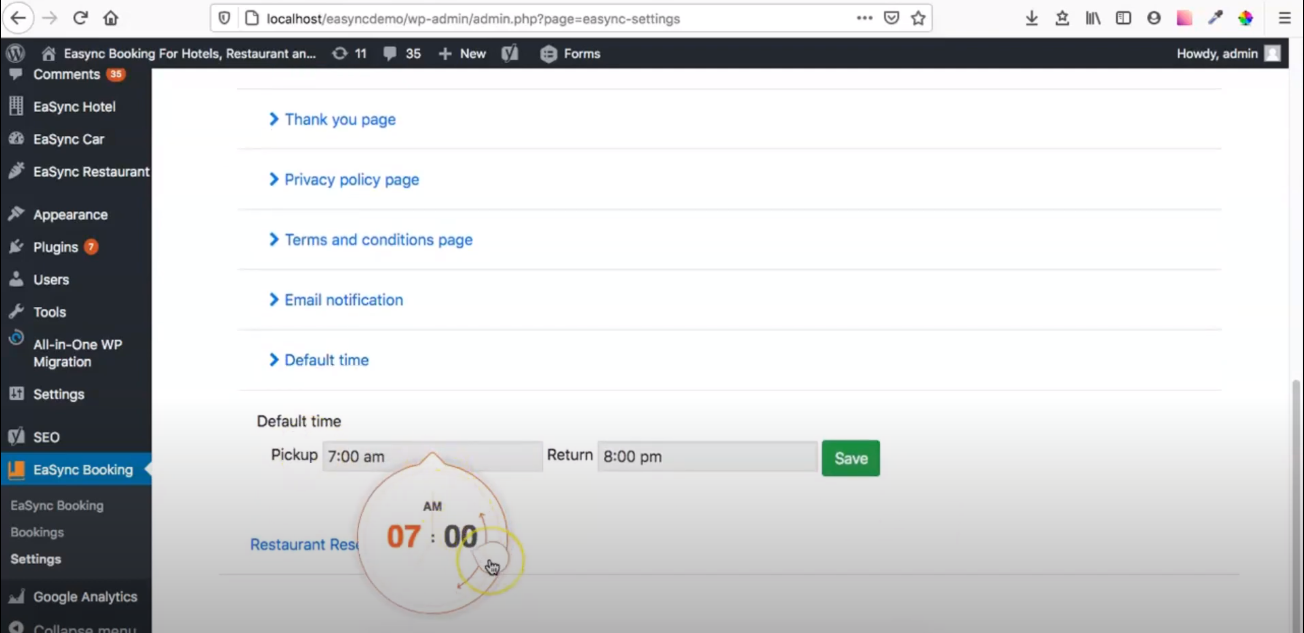
Then, scroll down to find the Car Rental drop-down button. Under Default Time, you can set the pick-up time and return time. Click on SAVE.
Adding Car Rental Booking Page
First, click on the Users tab on the admin dashboard. Then, on the next screen, copy the given shortcode for Car Rental. After that, click on the Pages tab located on the admin dashboard. Then, click on Add New.
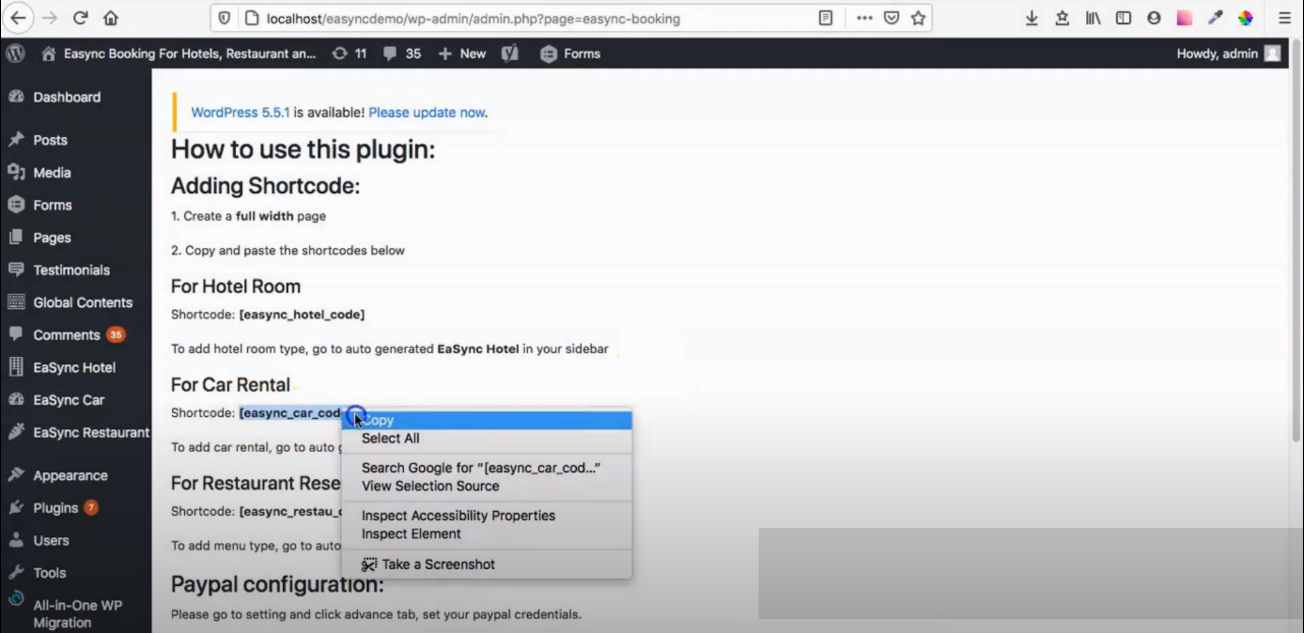
Copy Car Rental Shortcode
Enter the name of the new page. Then, paste the previously copied shortcode into the description box. On the right side of the screen, under Page Attributes, select “Full Width Page” as the Template for the new page.
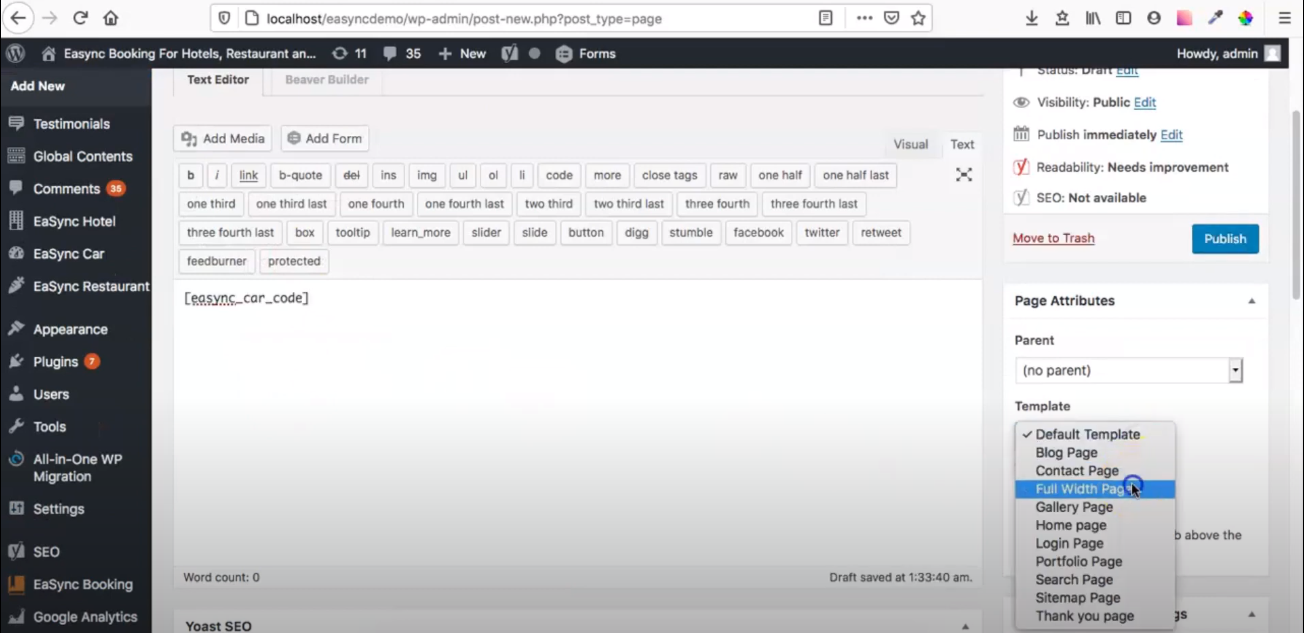
Indicate Page Name, Paste Shortcode, and Set Full Width Page as Template
After everything is all set, you can click on the Publish button.
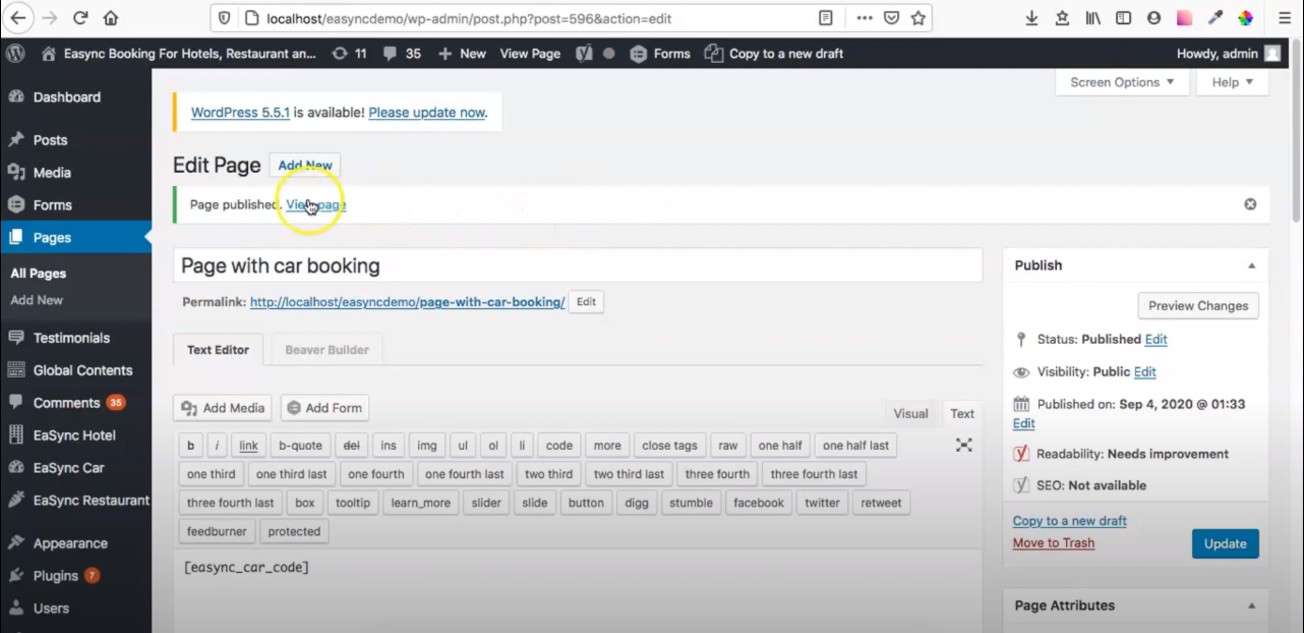
Click View Page to See Preview
Then, to see a preview of your Car Rental Booking page, you can click on View Page on the Edit Page section located above the Title Box.
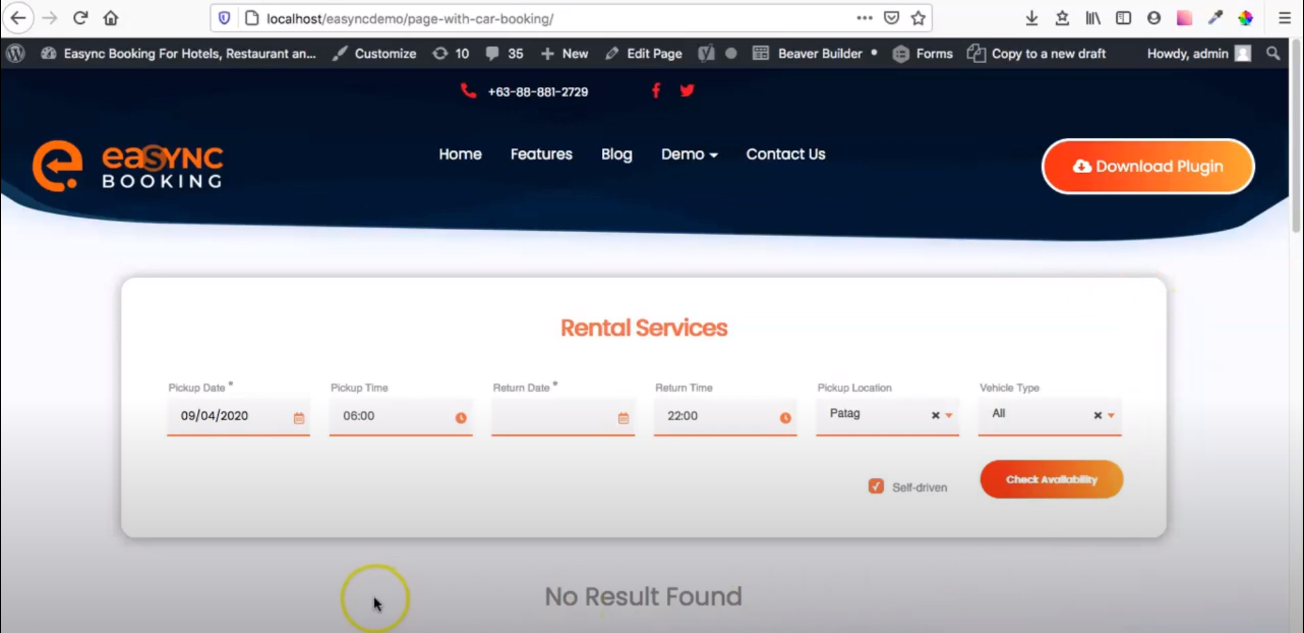
Preview of New Car Rental Booking Page
Viewing and Accepting Rental Entries
Click on the Bookings button found on the admin dashboard under eaSYNC Bookings.
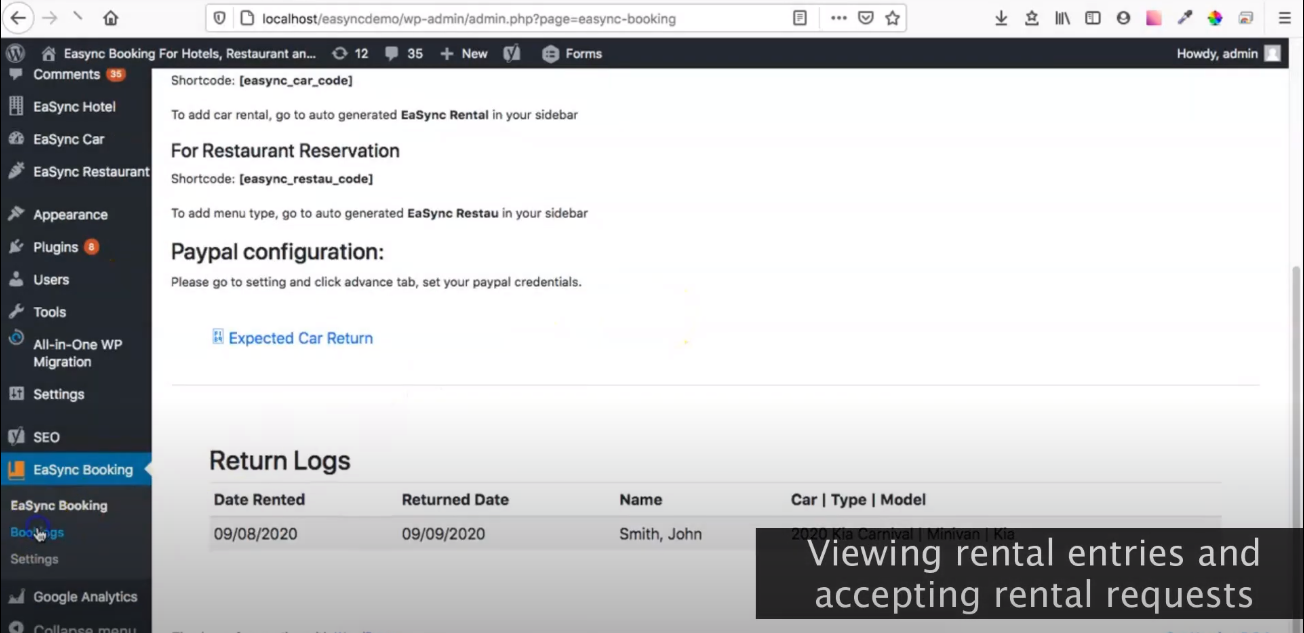
Click on Bookings
Then, click on Car Rent. Then, a calendar will show you the customers (highlighted in orange) who are trying to rent a car.
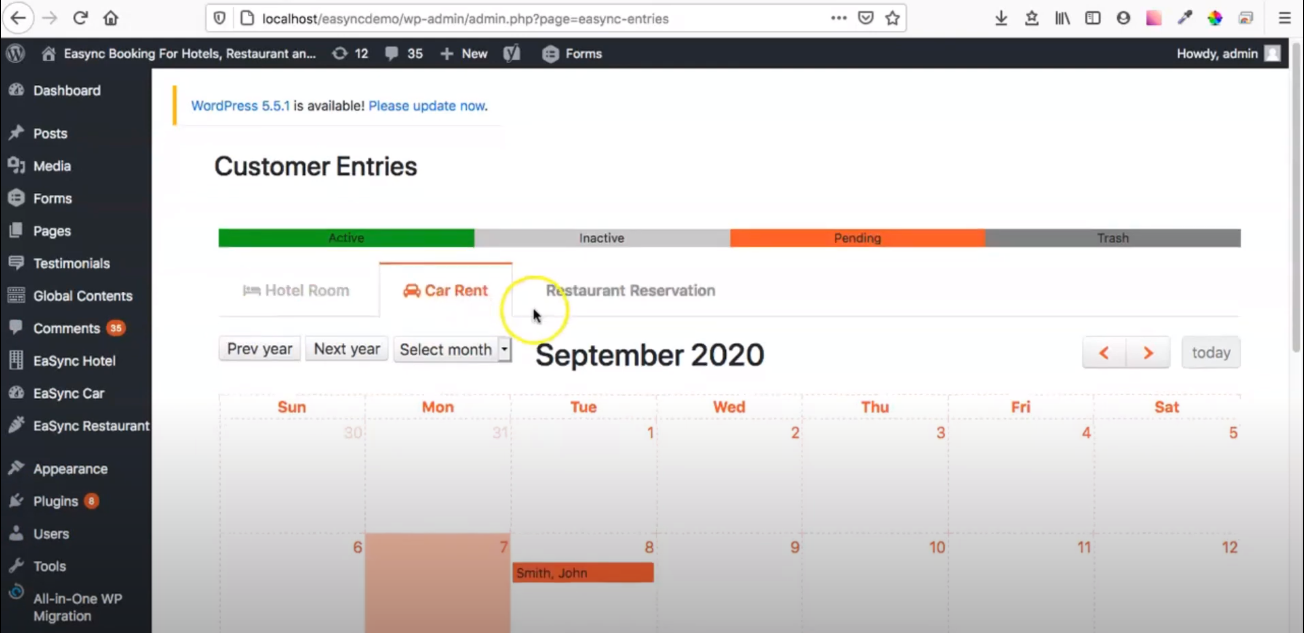
Calendar Viewing for Incoming Rental Entries
To see their rental request information, you can click on their name. Upon clicking, their rental information will pop up on your screen. Should you agree to their rental request, you can click on Start. After that, the customer has officially rented a car.
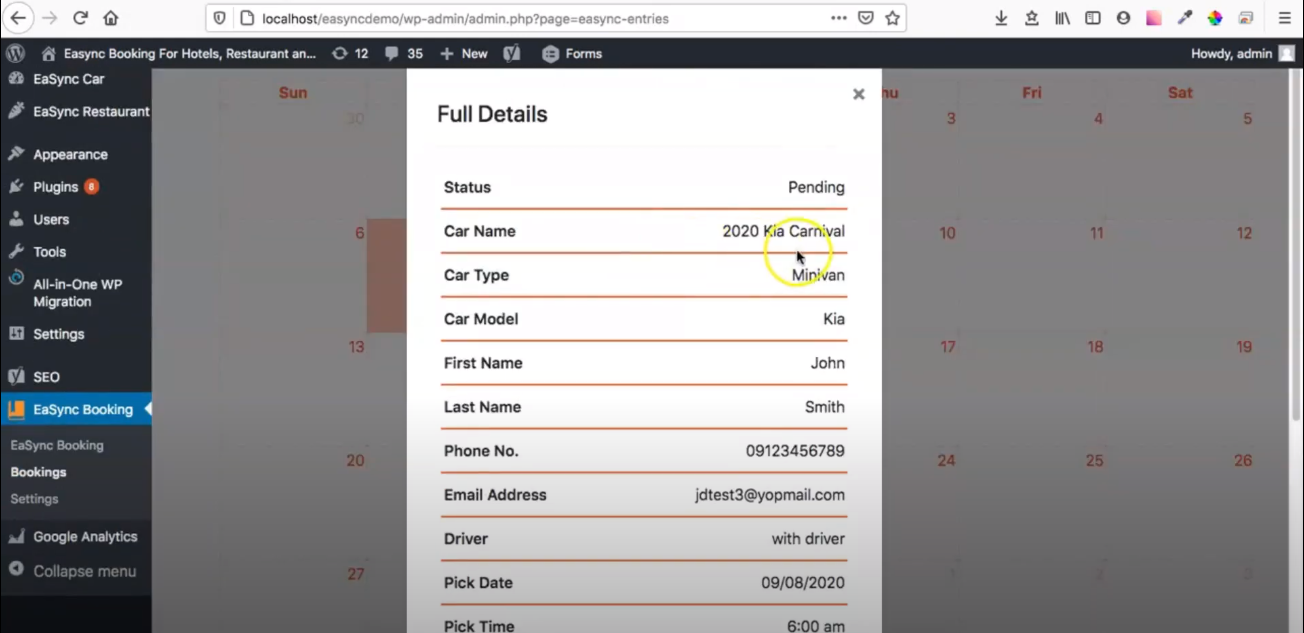
Click Start to Accept Car Rental Request
Upon successfully approving their request, it will then highlight the customer’s name in green.
Viewing and Ending Rental Entries
First, click on the Bookings button found on the admin dashboard under eaSYNC Bookings. Hit on the Car Rent button. Then, a calendar will display the customers (highlighted in green) who are currently renting your car.
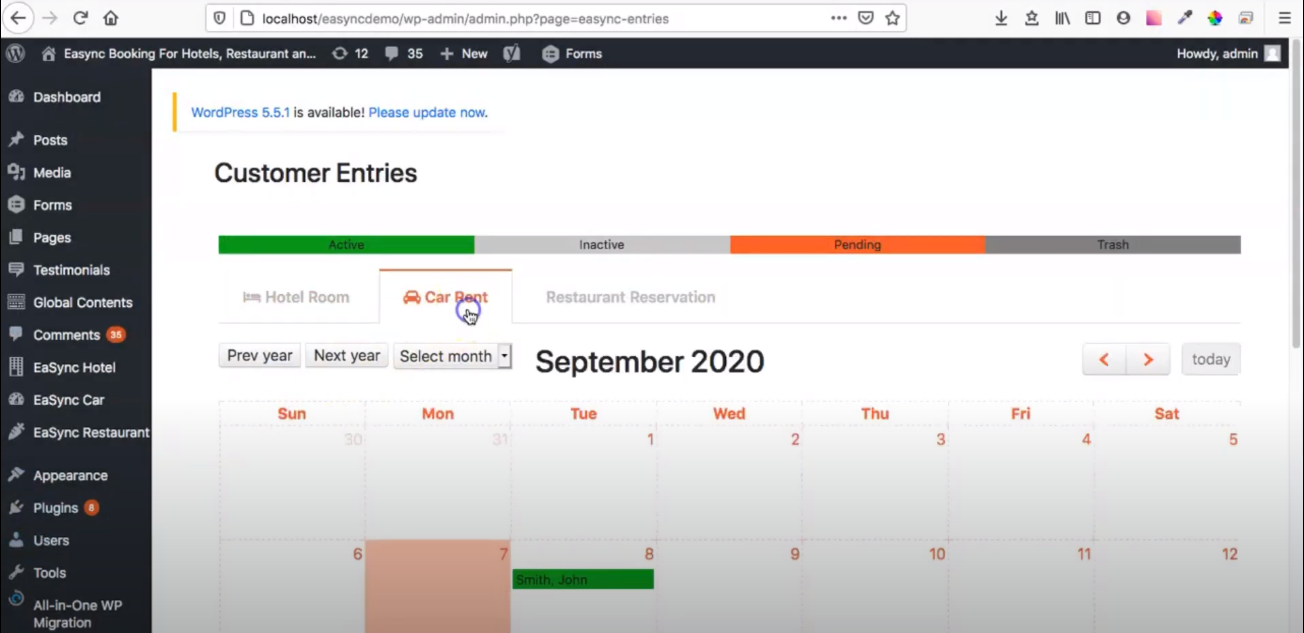
Calendar Viewing for Ongoing Rental Entries
To end a particular customer’s car rental, click on their name. Then, their booking information will pop up on your screen. Hit the End button to end their car rental officially.
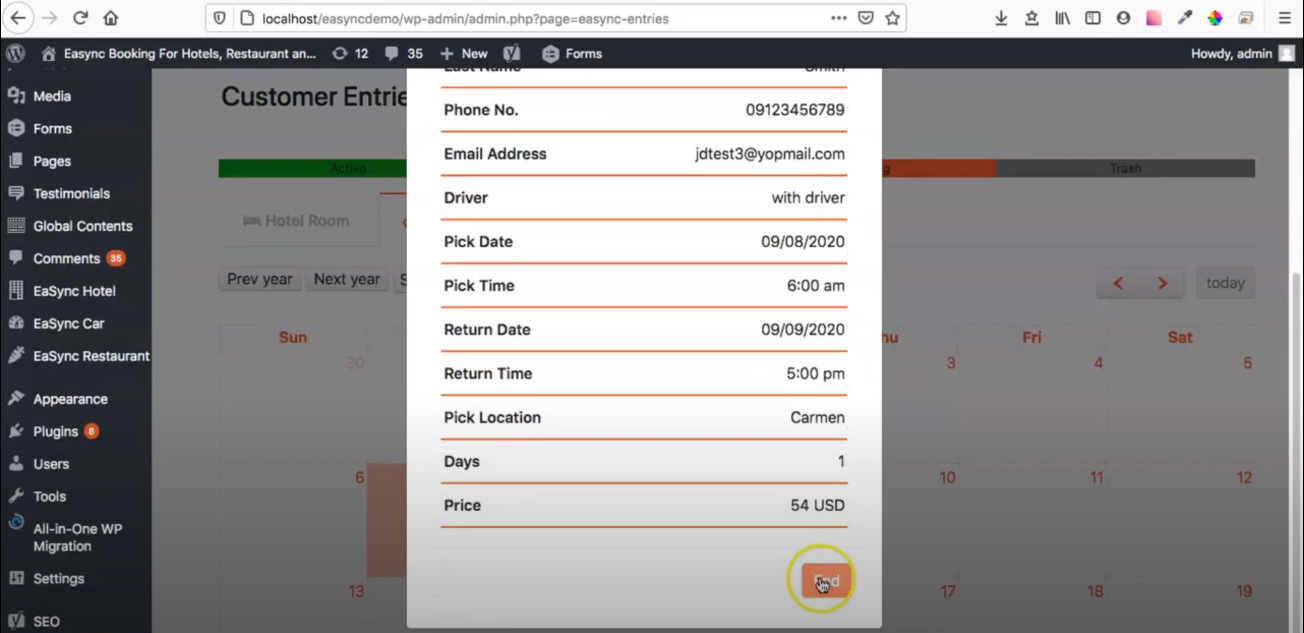
Upon successfully ending their car rental, it will then highlight the customer’s name in gray.
Adding PayPal Sandbox Keys
Under eaSYNC Booking on the admin dashboard, click on the Settings tab. Then, Click on Advance and enter the Sandbox key under the PayPal settings. Select Sandbox in the Use section. Then, click the Save button.
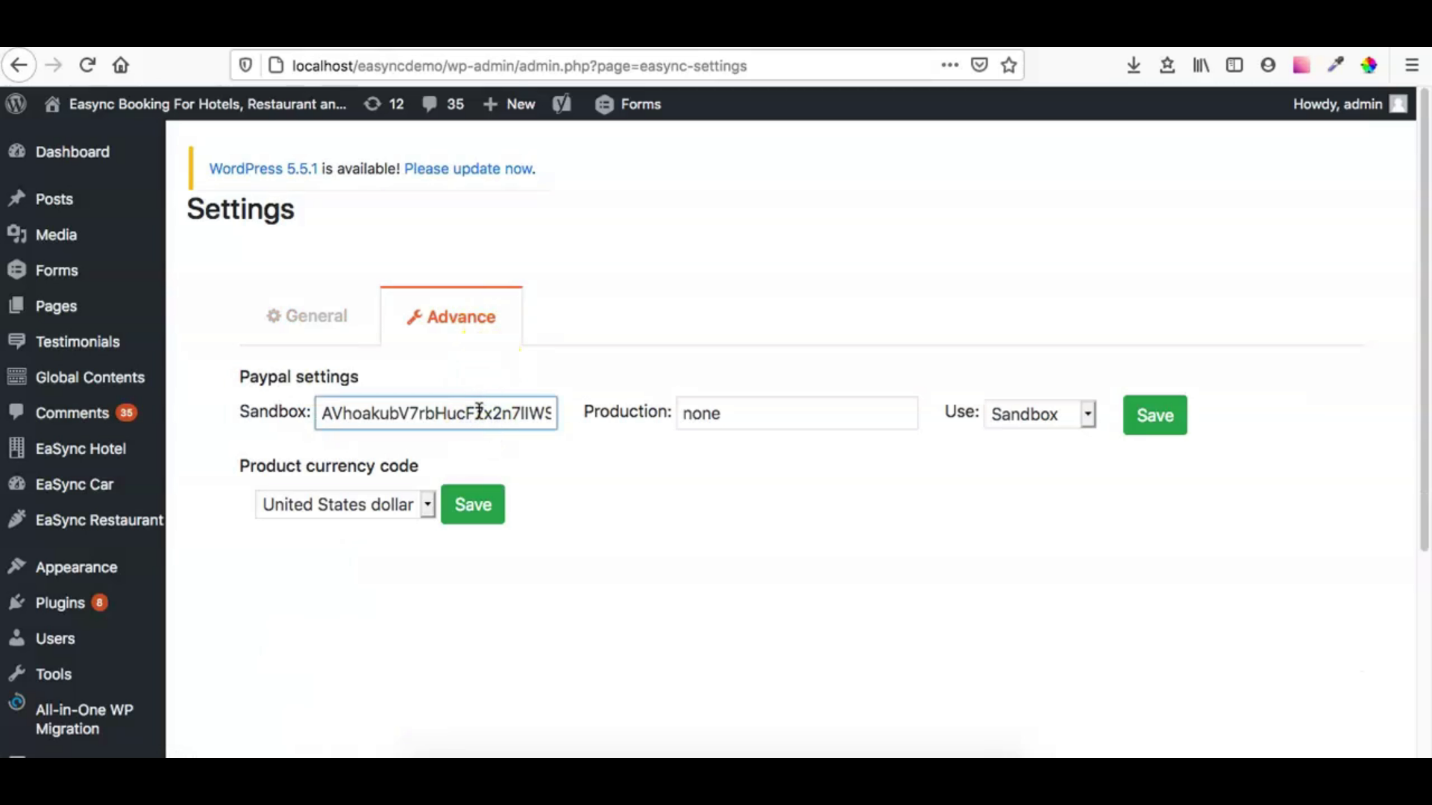
Place Sandbox Key for PayPal
Adding PayPal Production Keys
Similarly, under the eaSYNC Booking tab on the admin dashboard, click on Settings. Then, click on Advance and enter the Production key under the PayPal settings. On the Use section, select Production. Lastly, click Save.
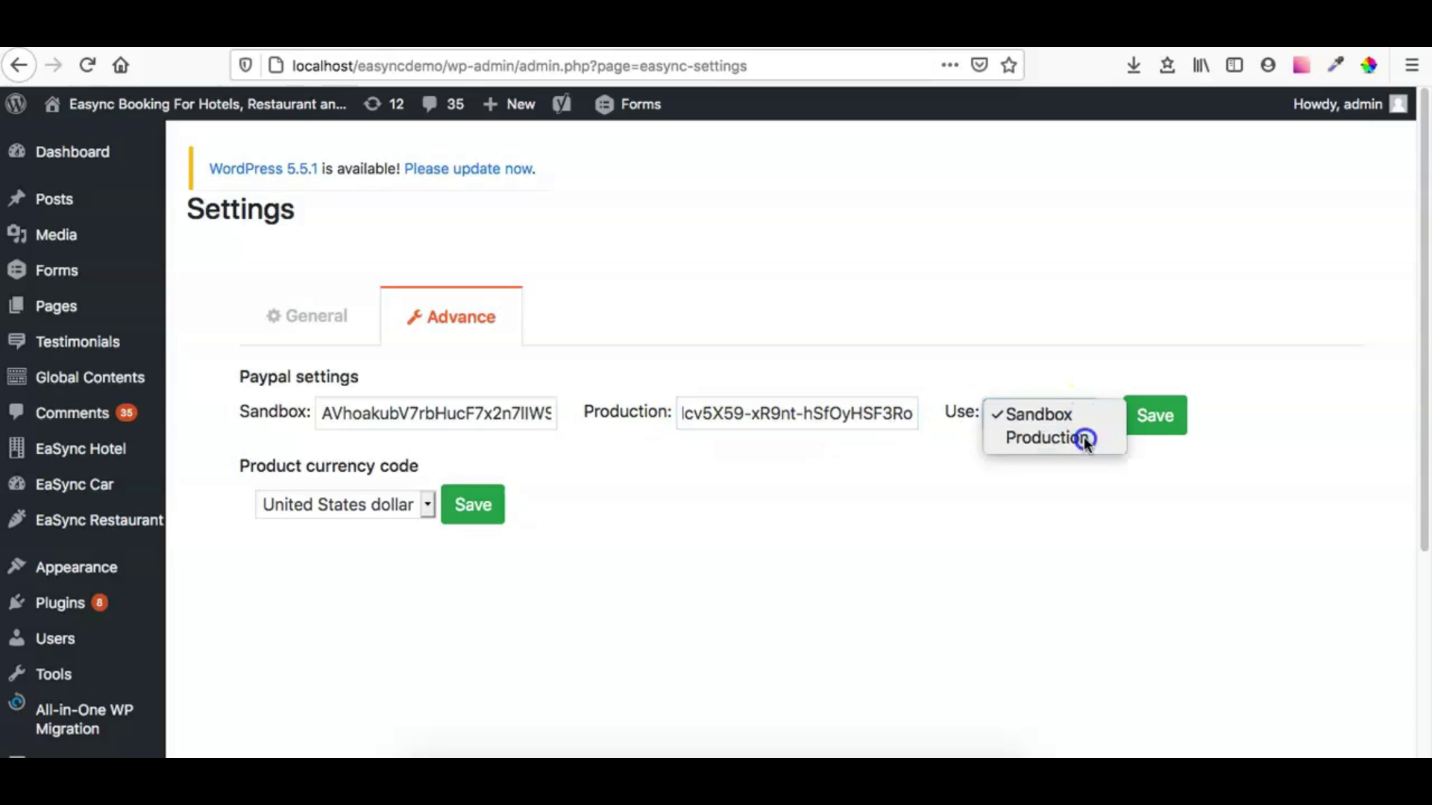
Place Production Key for PayPal
Setting Up Currency
Under eaSYNC Booking on the admin dashboard, click on Settings. After that, click on Advance.
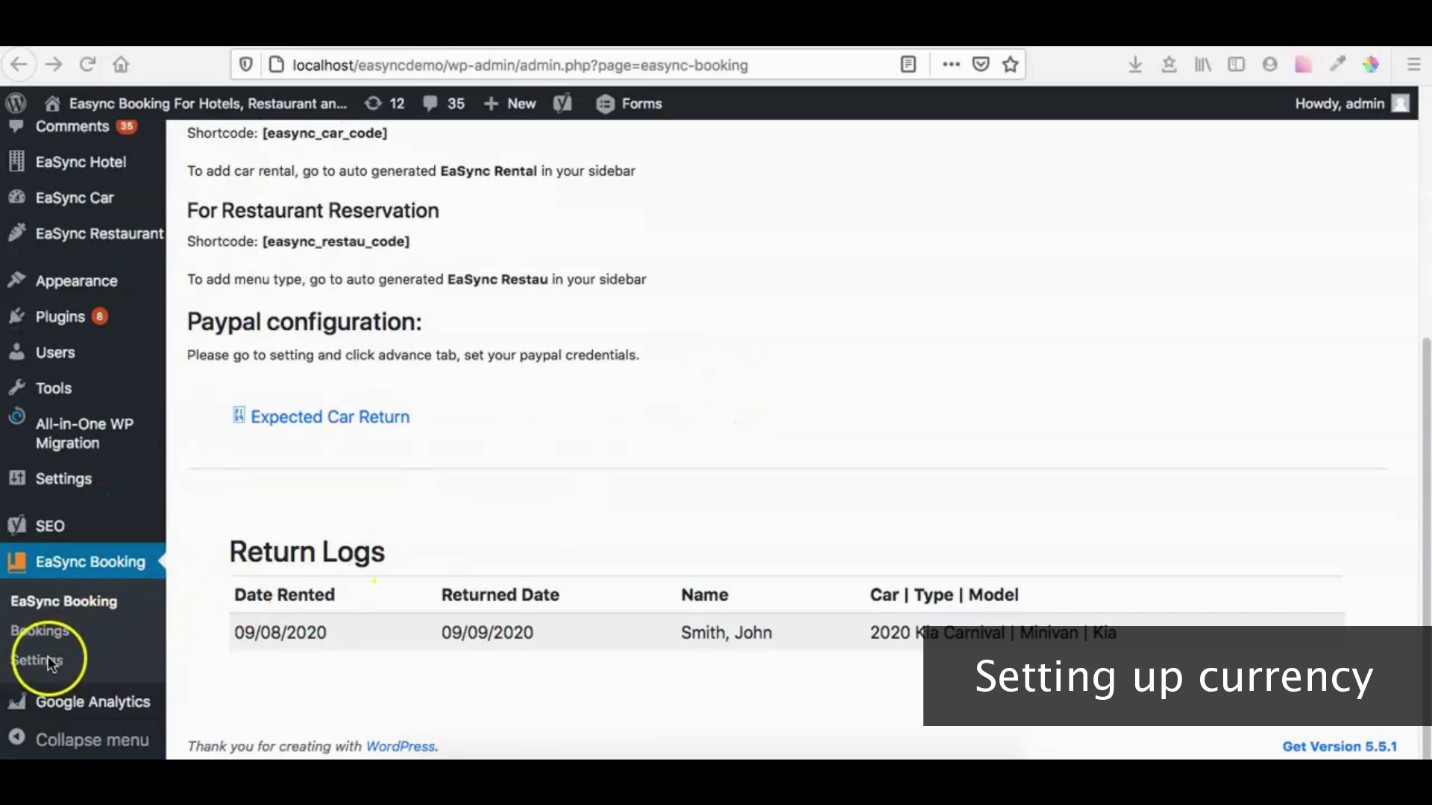
Click on Settings to Set Up Currency
Select the currency of your choice on the Product Currency Code section. Then, hit on the Save button.
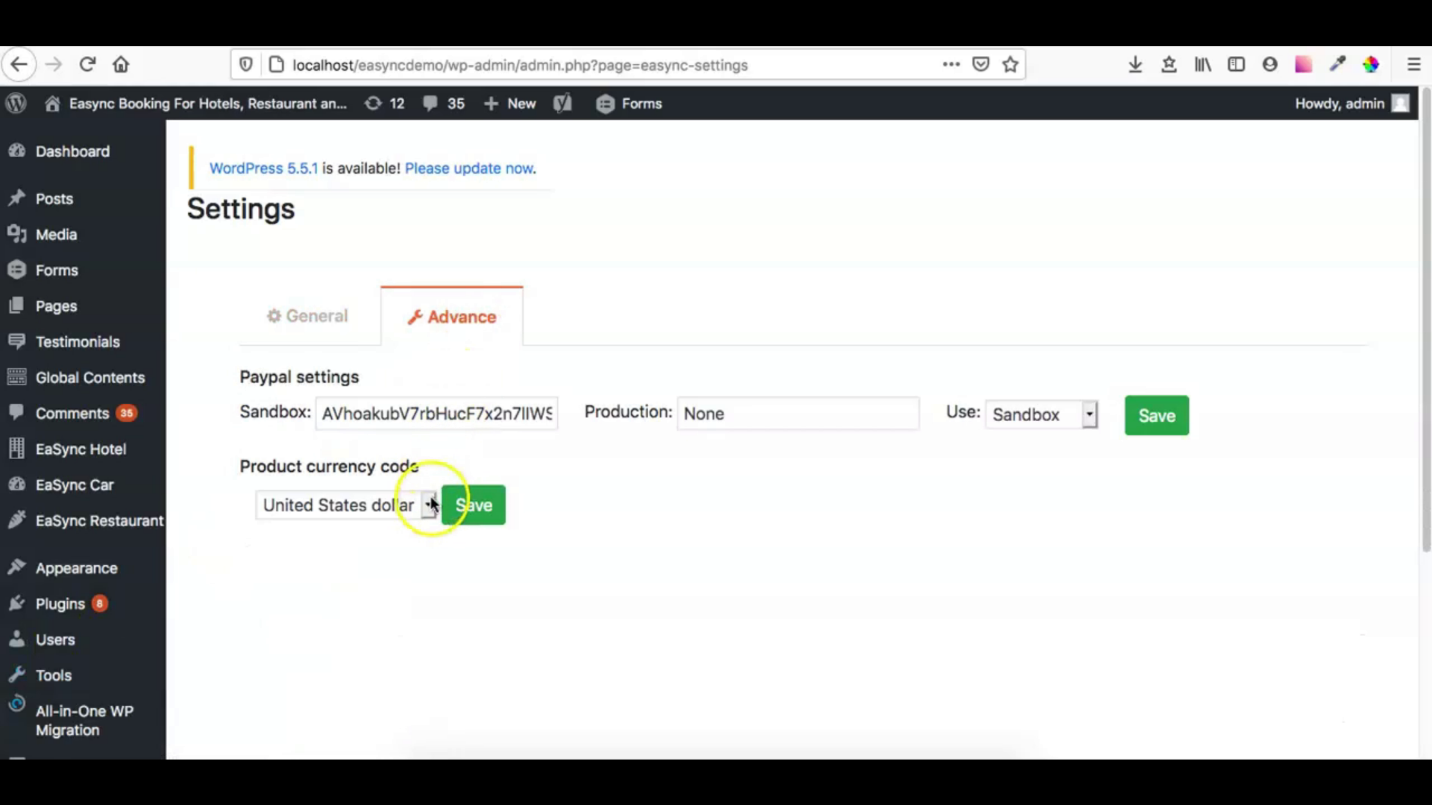
Choose Currency of Choice
Try Out a Free Car Reservation System for Your WP Website!
Having gone through this article, you may have realized how easy it is to install the eaSYNC Booking plugin for your WordPress website. Employ this car rental booking plugin to manage car rentals and provide your customers with a way to rent cars with only a few clicks of a button.
Get a car reservation system for your car rental website today! Try out the eaSYNC Booking Demo here for FREE!
Related Articles
-
How to Create an Engaging Car Rental Website
Now that you have successfully put up a car rental website, the next thing that you should focus on is...
Posted on Jan 14, 2021 -
Car Rental Plugin Demo: A Walkthrough
Are you interested in integrating a WordPress car rental plugin with your car rental website? If so, then you are at the right place. In this ar...
Posted on Nov 24, 2021 -
How to Expertly Market Your Car Rental Business
How to Expertly Market Your Car Rental Business Marketing is one of the fundamental factors that contribute...
Posted on Apr 23, 2021 -
WordPress Car Rental Plugin Feature Must-Haves
WordPress Car Rental Plugin: To The Rescue for Companies To ensure a smooth and straightforward booking...
Posted on Aug 19, 2020 -
The Best Car Rental Website for Your Business and Its Benefits
The car rental industry has undergone several changes in continuing its services in lending vehicles. For...
Posted on Nov 17, 2023 -
eaSYNC Booking Plugin and Who Should Use It To Boost Business
The Opportunity via eaSYNC Booking At its heart, online booking systems such as eaSYNC Booking are tech...
Posted on Dec 26, 2019


